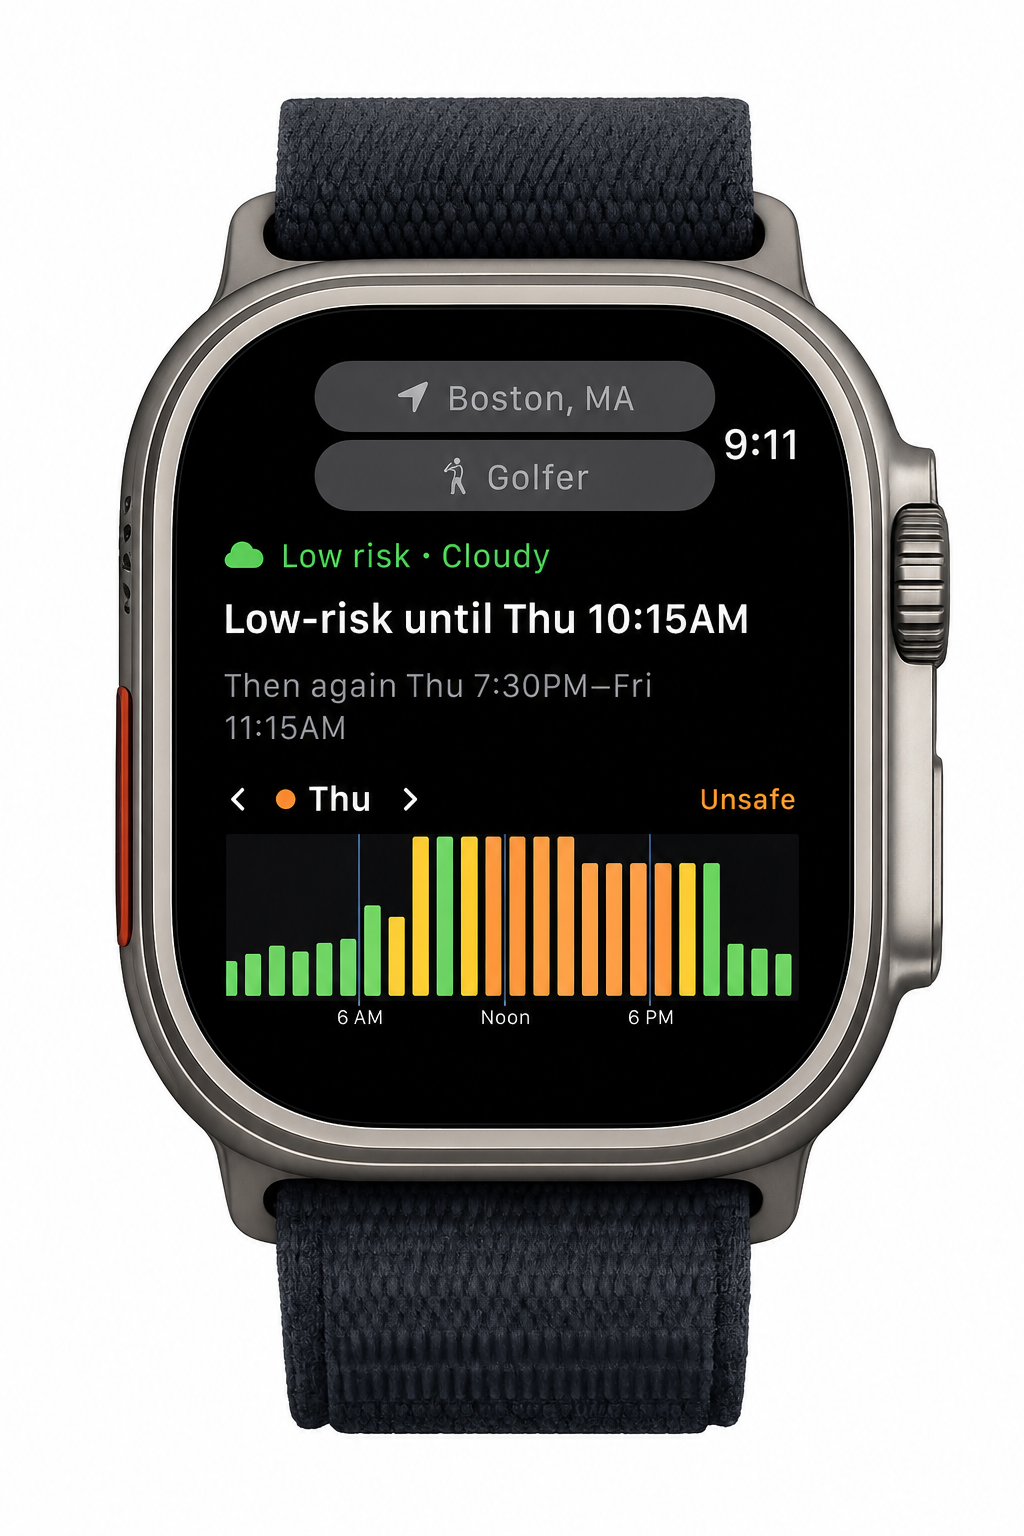
Quick Start
In a few minutes, learn where to look, what the colors mean, when to go, and what to keep visible while you are outside.
- 1. Choose where Current location or saved place.
- 2. Choose an activity Storm Window judges risk by what you are doing.
- 3. Read the risk Understand Low Risk, Caution, Unsafe, and Dangerous.
- 4. Check the hours Use Forecast for the hourly pattern.
- 5. Read the why Factors drive risk; Conditions add context.
- 6. Find Best Time Use duration, quality, and Start by.
- 7. Open maps Use Lightning Map and Wind Map when location matters.
- 8. Start a session Keep risk and time remaining visible.
- 9. Plan ahead Use Plans and alerts for future commitments.
- 10. Glance later Use Watch, widgets, Siri, and Shortcuts.
Step 1
Choose where you are checking.
Storm Window starts with a place. Use your current location, search for a city or ZIP/postal code, or switch to a saved place. The selected place controls the forecast, maps, widgets, and Apple Watch context.
If you have multiple saved places, the `Now` and `Forecast` tabs can move between eligible locations while keeping the app focused on the same basic question: is this a good window to be outside?
Step 2
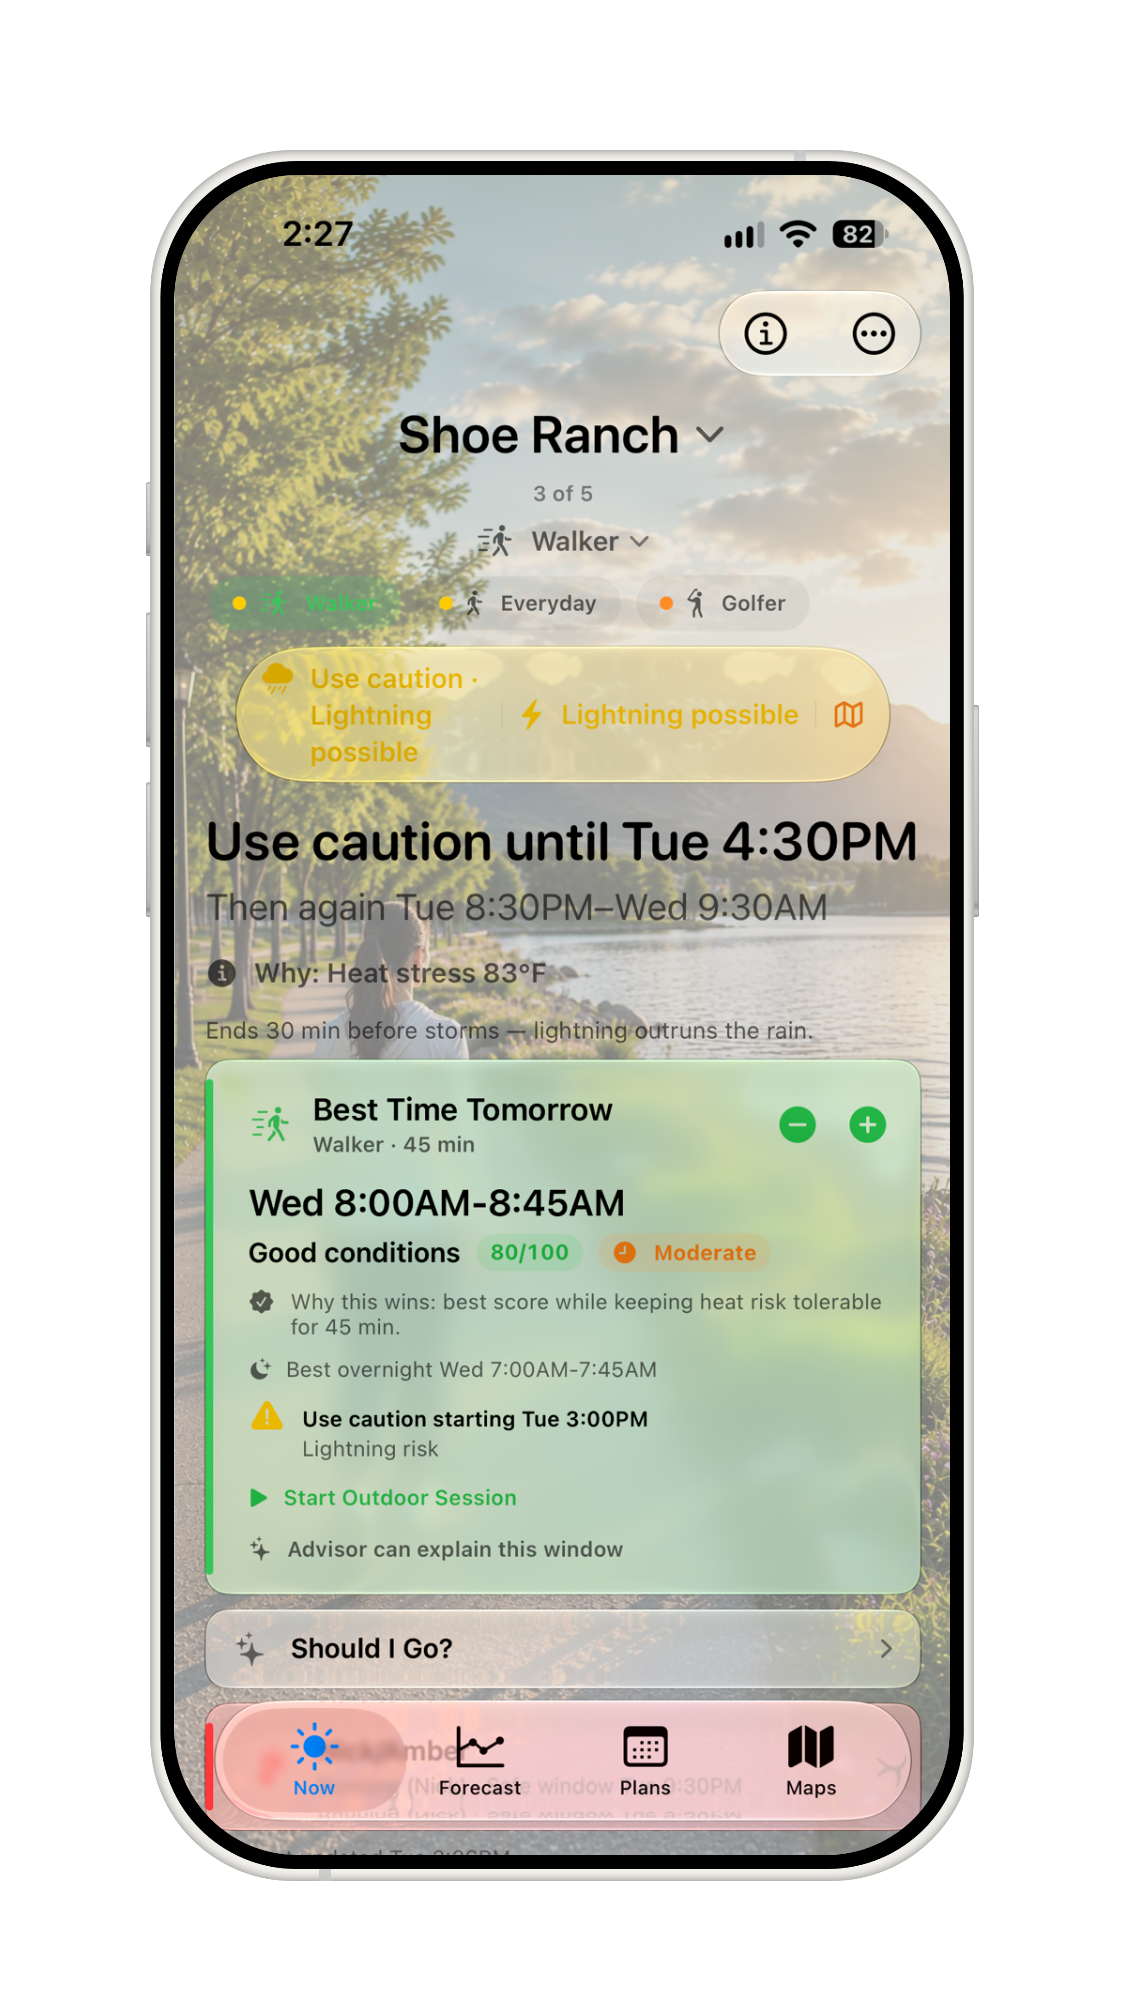
Choose what you are doing.
Tap the activity control to choose an activity profile such as Everyday, Walker, Runner, Cyclist, Golfer, Beach, Paddler, or Outdoor Worker. Storm Window uses the activity to decide which hazards matter and how early a condition should become caution or unsafe.
Some places can watch more than one activity. For example, a lake house might show separate verdicts for golf, swimming, and boating.
Step 3
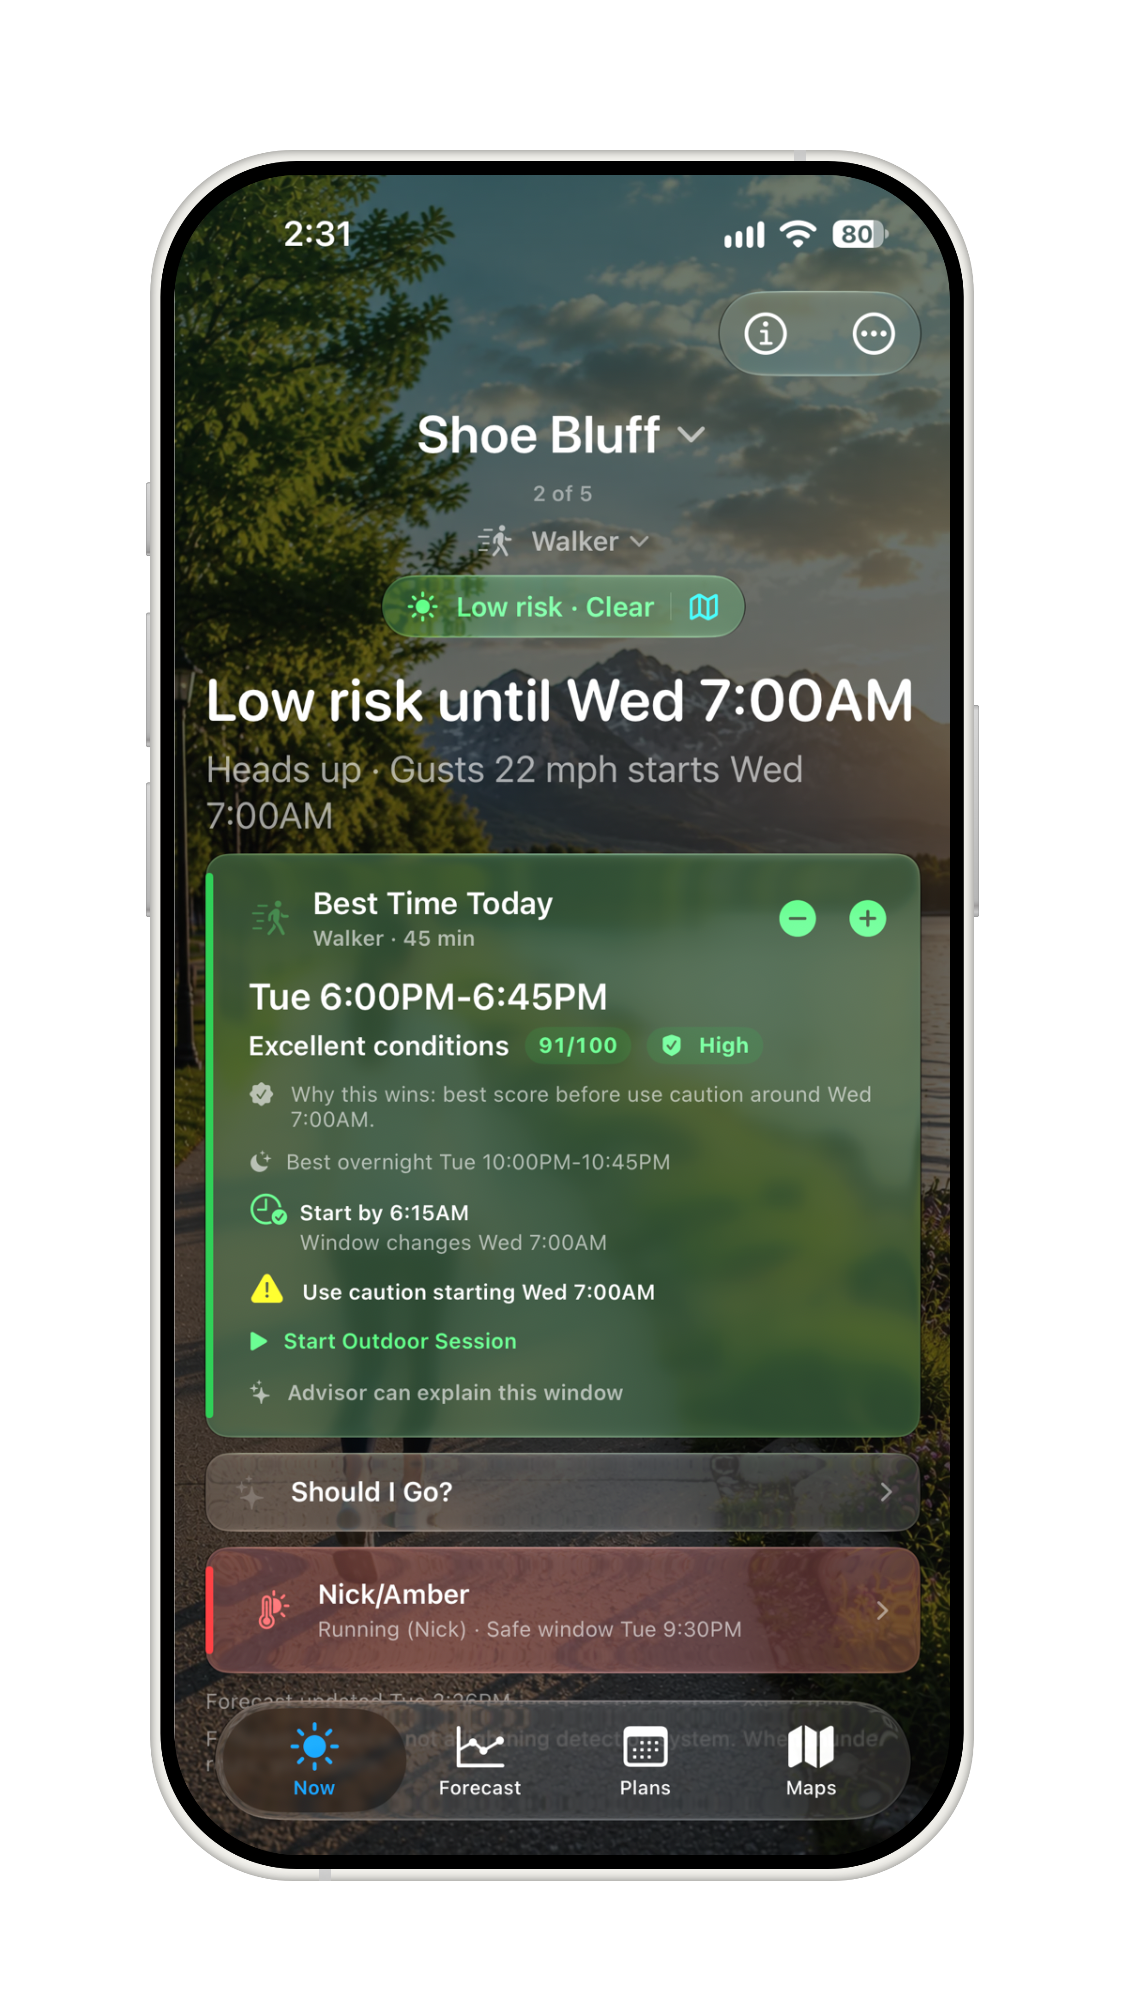
Read the current risk first.
The large `Now` verdict answers whether the selected activity and place are usable right now. The time-remaining line tells you how long the current lower-risk window is expected to last, or when the next better window begins.
Step 4
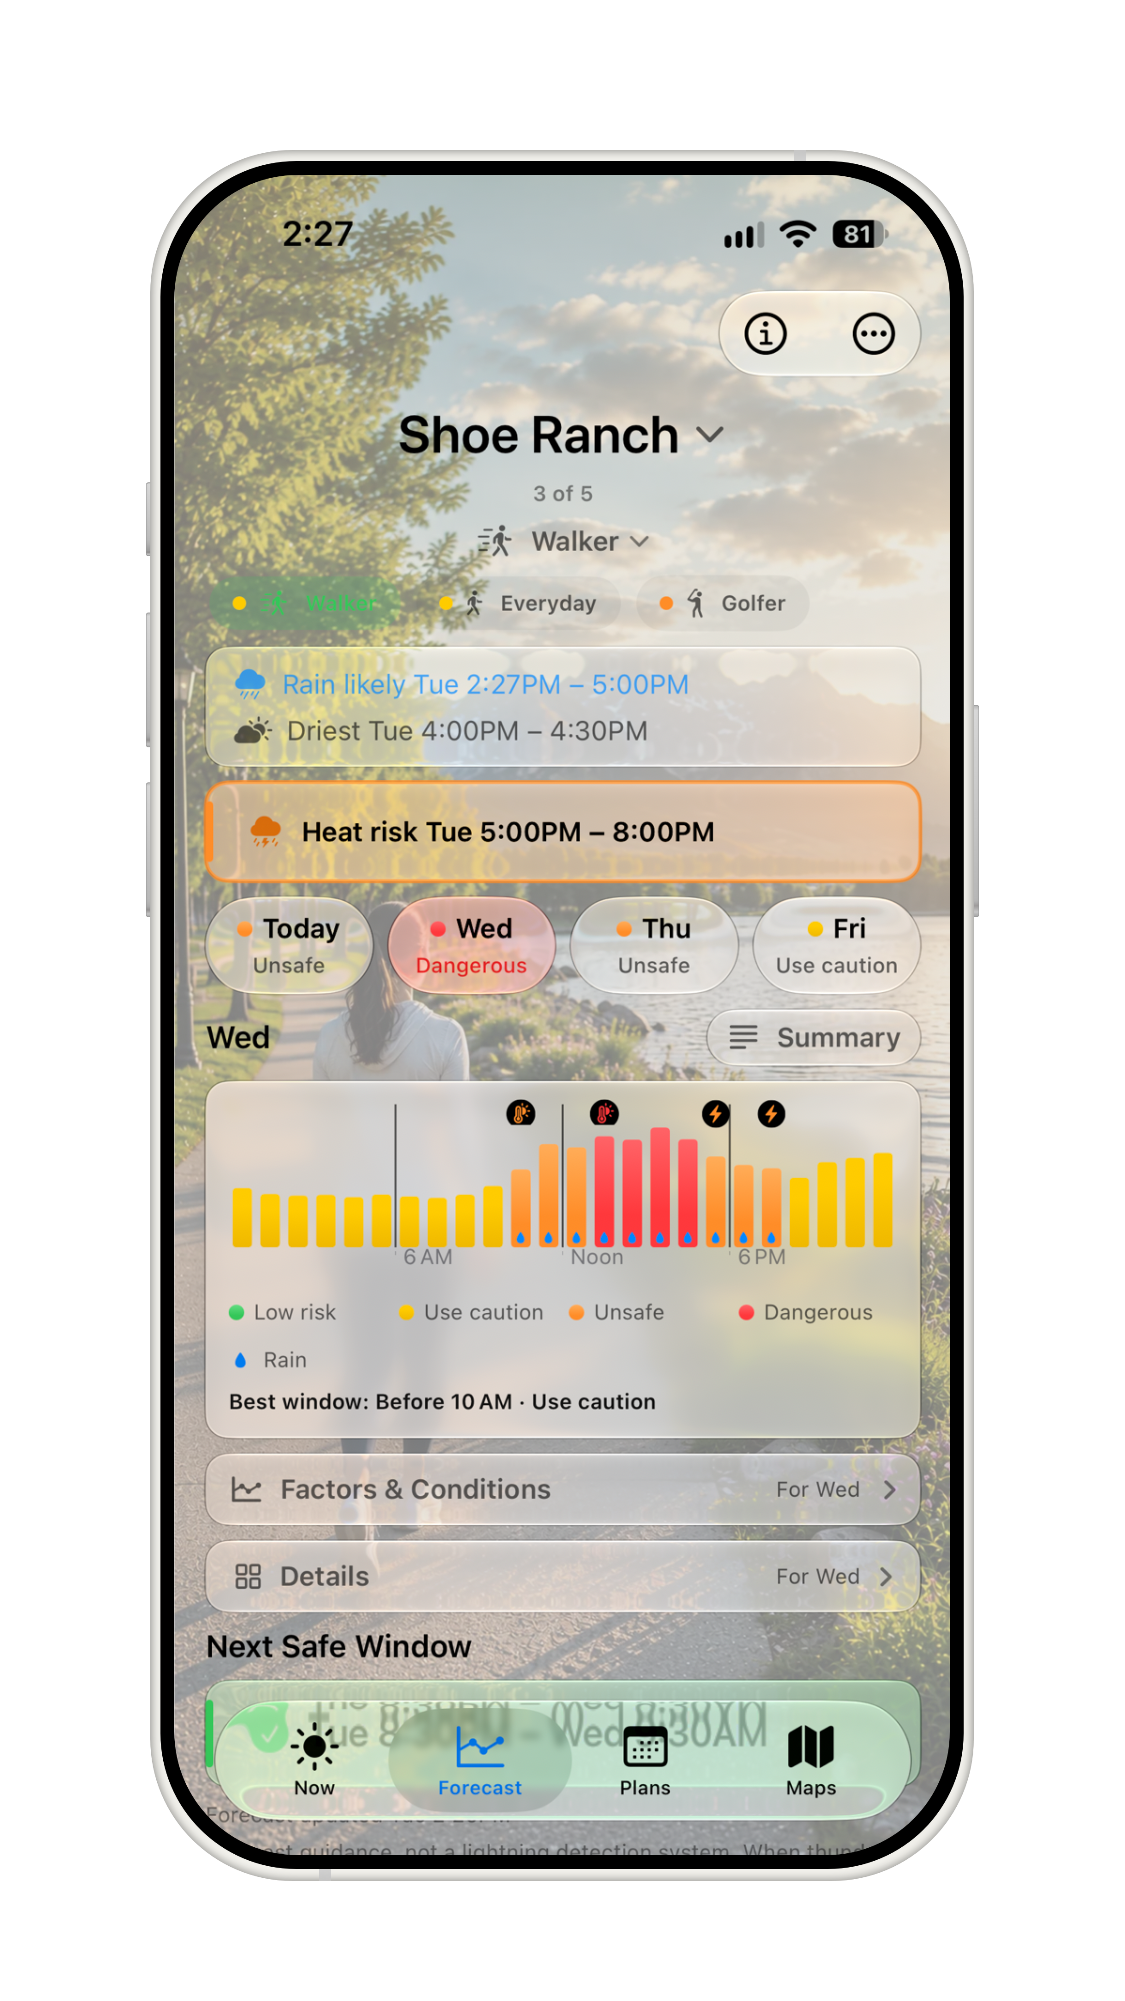
Use Forecast for the hourly pattern.
The `Forecast` tab shows the hourly risk chart and the day-by-day forecast context. Each hour keeps the same risk colors as the `Now` verdict, so you can see whether conditions are steady, improving, or closing in.
Tap or swipe through the day view when you need details. The chart is for timing; the headline is still the plain-language answer.
Step 5
Use Factors and Conditions to understand why.
Factors are the signals that drive or explain the risk verdict: wind gusts, heat, storms, air quality, marine hazards, cold water, and official alerts when they apply.
Conditions are useful context that does not close the low-risk window by itself, such as precipitation, temperature, sky, UV, and comfort.
A cloudy or lightly rainy hour can still be Low Risk. A sunny hour can be Unsafe if heat, air quality, wind, lightning, water, or official alerts make the selected activity risky.
Step 6
Find Best Time Today and Start by.
`Best Time Today` finds a low-risk window sized to the selected activity duration. It ranks usable windows with a quality label and score, then shows `Start by` guidance: the latest practical time to begin and still finish before conditions change.
Quality is separate from safety. A lower-quality window can still be usable, and an unsafe hour cannot become safe just because the score is high.
Step 7
Open maps when space matters.
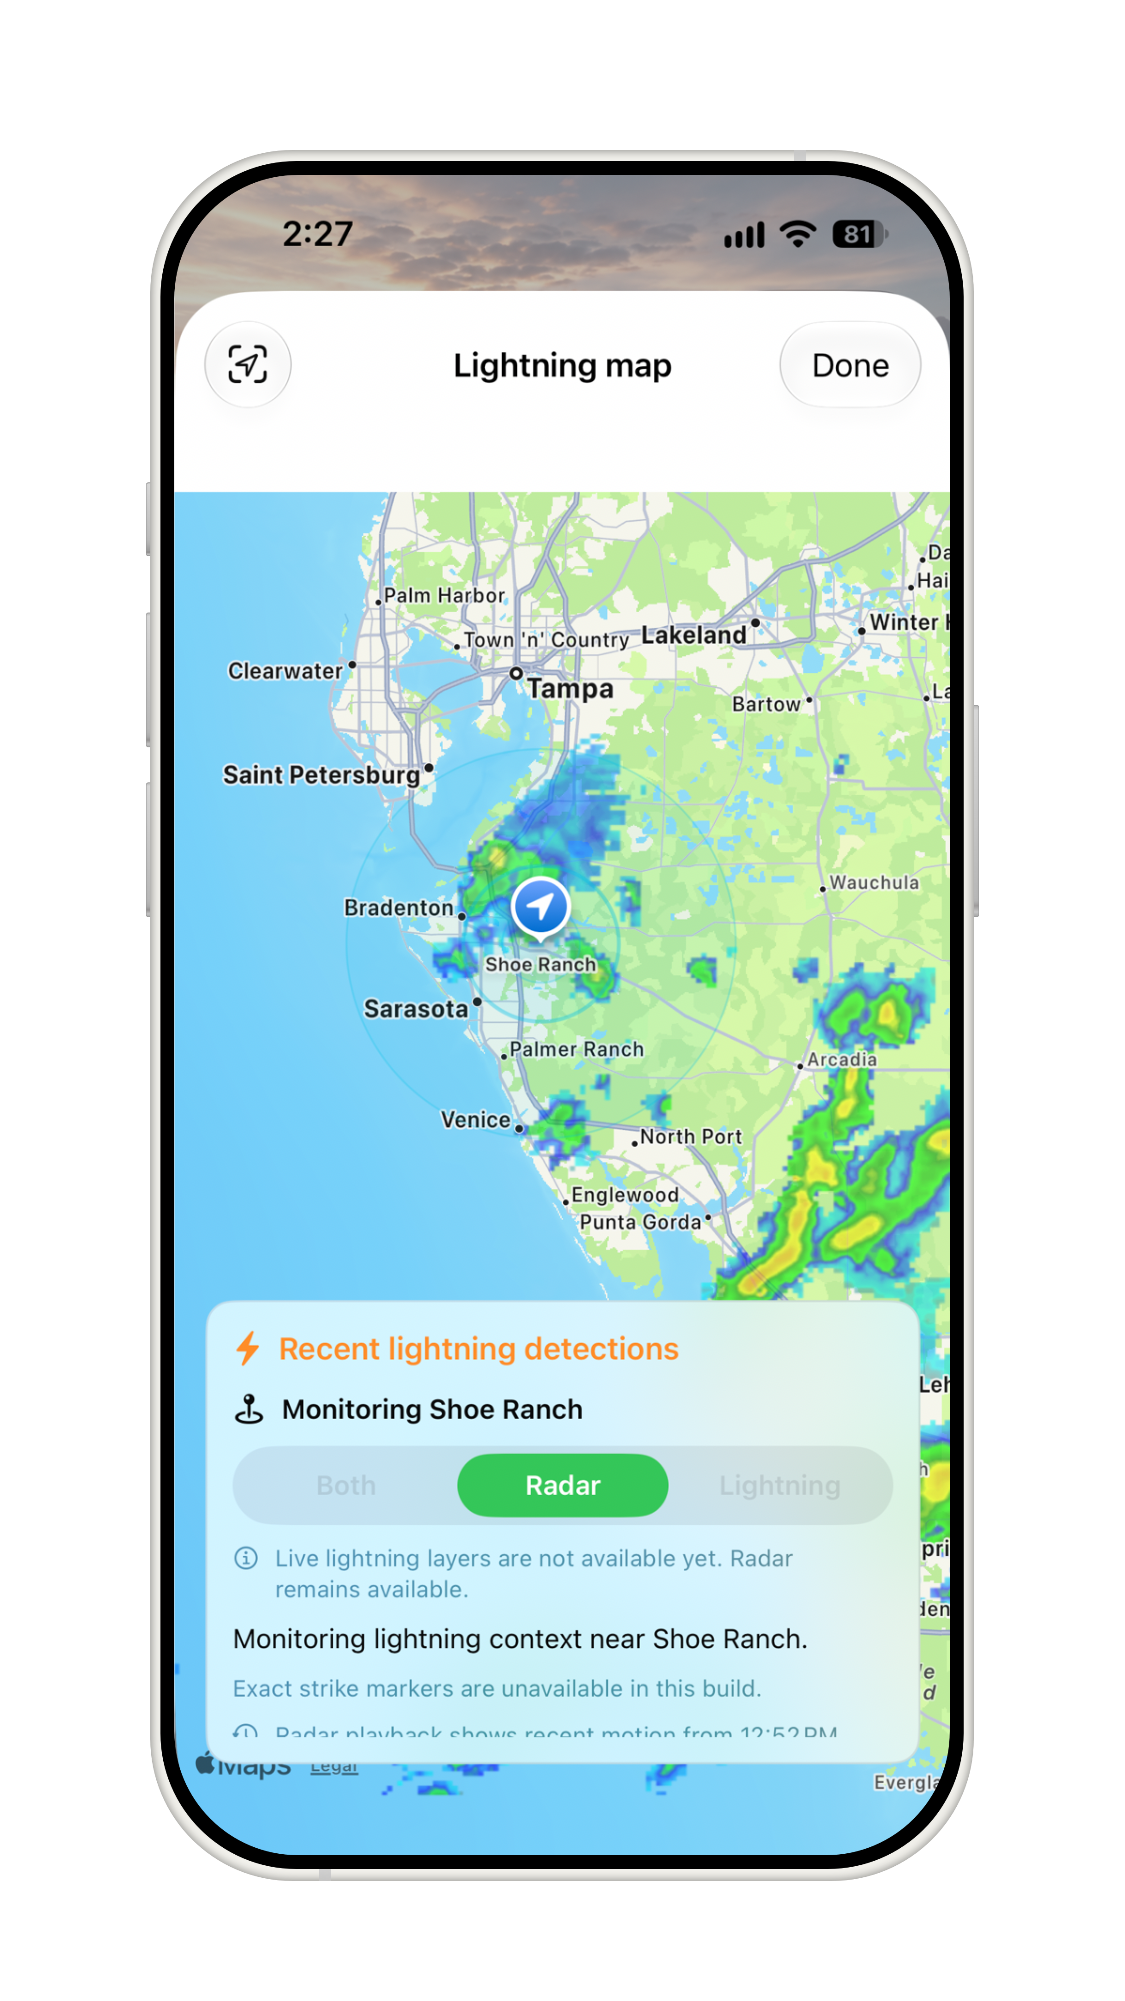
The `Maps` tab opens focused map tools. `Lightning Map` shows recent/current radar and lightning-density context near your location. It is not a future lightning forecast.
`Wind Map` looks ahead over available forecast hours with wind speed, gusts, direction, and a safe-window timeline. Storm Window’s point forecast and activity thresholds remain the source of the verdict. For details, see the User Guide’s Maps, Lightning Map, and Wind Map sections.
Step 8
Start an Outdoor Session when you head out.
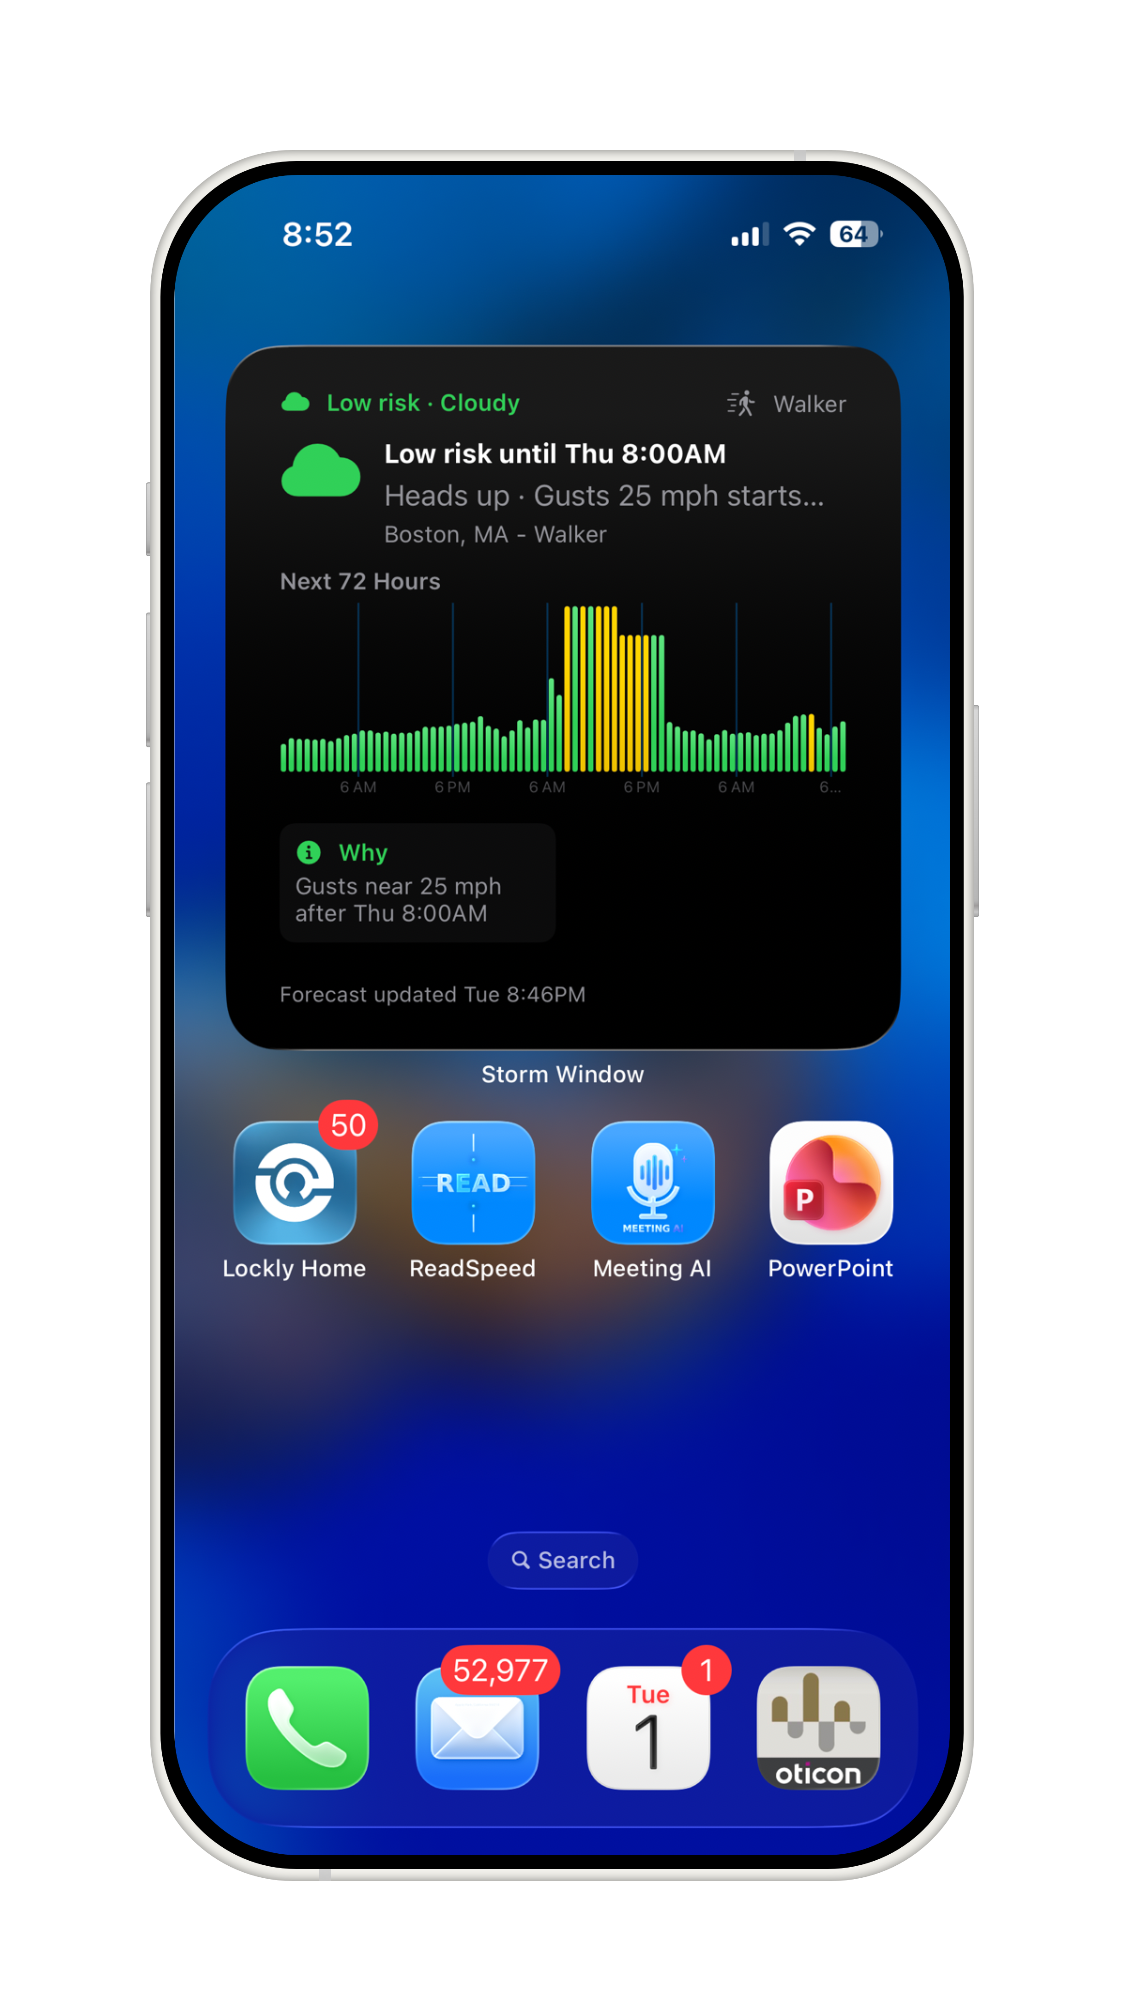
An Outdoor Session keeps the selected activity window visible while you are outside. It can show current risk, remaining usable time, expected end, and the next change on iPhone, Apple Watch, the Lock Screen, Dynamic Island, widgets, Siri/Shortcuts, and Control Center where supported. On supported Live Activity surfaces, use +15 min to extend the session or End to stop it. See Outdoor Session and Live Activity in the User Guide.
Outdoor Session is not a workout tracker. It does not collect pace, distance, calories, or heart-rate data.
Step 9
Use Plans and alerts for future commitments.
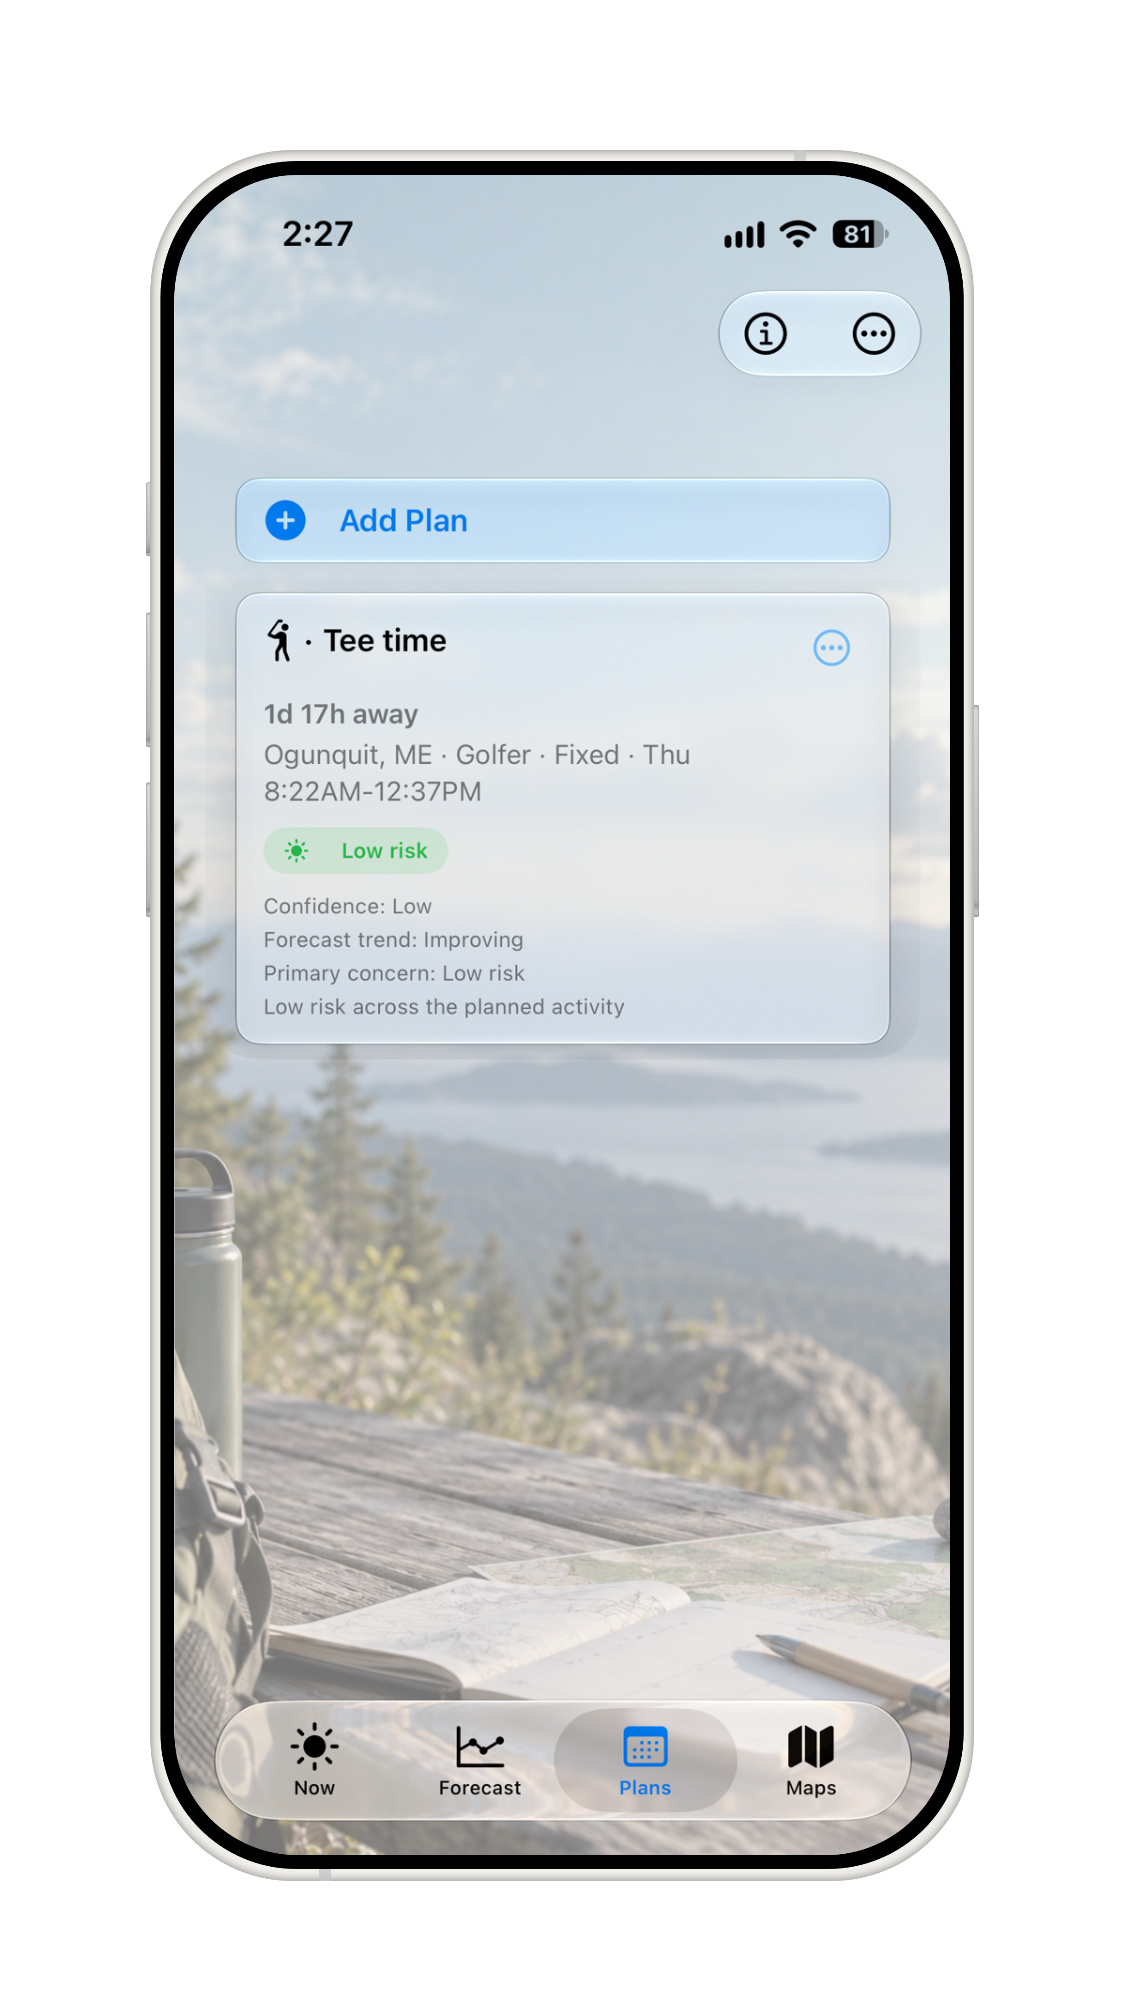
`Plans` are for outdoor commitments like tee times, races, practices, work shifts, and swim meets. A Plan can be fixed to an exact start or flexible within a range so Storm Window can recommend the best start inside it.
Free users can enable imminent-hazard alerts for the active location. Pro+ adds proactive planning alerts such as window-change, best-window, next-window, daily briefing, and Plan forecast changed alerts where supported. See Plans and Alerts in the User Guide.
Step 10
Glance from Watch, widgets, Siri, and Shortcuts.
Home Screen widgets, Lock Screen widgets, Apple Watch, and complications show compact guidance without opening the app. Siri and Shortcuts can answer common questions from cached Storm Window facts, such as the current safety verdict, next safe window, current activity window, or Plan status depending on tier.
For details, see Apple Watch, Widgets and Controls, and Siri and Shortcuts in the User Guide.